
You don’t need a mechanic to tell you when brake pads are done—you need a ruler and two minutes. Most shops will say “these look thin” without showing you the number, and you’re left guessing whether you’re at 4 mm or 2 mm. One means you have months; the other means you’re a week out from grinding metal on metal. This guide shows you how to check thickness yourself, what the legal and safe limits actually are, and when replacement moves from “schedule it” to “do it now.”
The brake warning light doesn’t always come on early, and the squealer tab only screams when you’re already past the point where you should’ve acted. If you wait for noise, you’re paying for rotors too.
What you’ll need
Tools:
- Floor jack and two jack stands (rated for your vehicle weight)
- Lug wrench
- Flashlight or work light
- Digital or dial caliper (optional but recommended; $15–$30 at any auto parts store)
Materials:
- None for inspection
- Gloves (brake dust is filthy)
Prerequisites:
- Ability to safely jack and support your vehicle
- Know which wheels are front vs. rear
Before you start
Park on level ground and engage the parking brake. If inspecting front wheels, chock the rear wheels. Brakes are safety-critical—if you see damage, hear grinding, or feel a soft pedal, skip the DIY check and go straight to a shop. Inspection is low-risk; brake pad replacement is not.
Never work under a car supported only by a jack. Use jack stands, and verify they’re secure before you work near a rotor.
Step 1: Remove the wheel and locate the brake pads
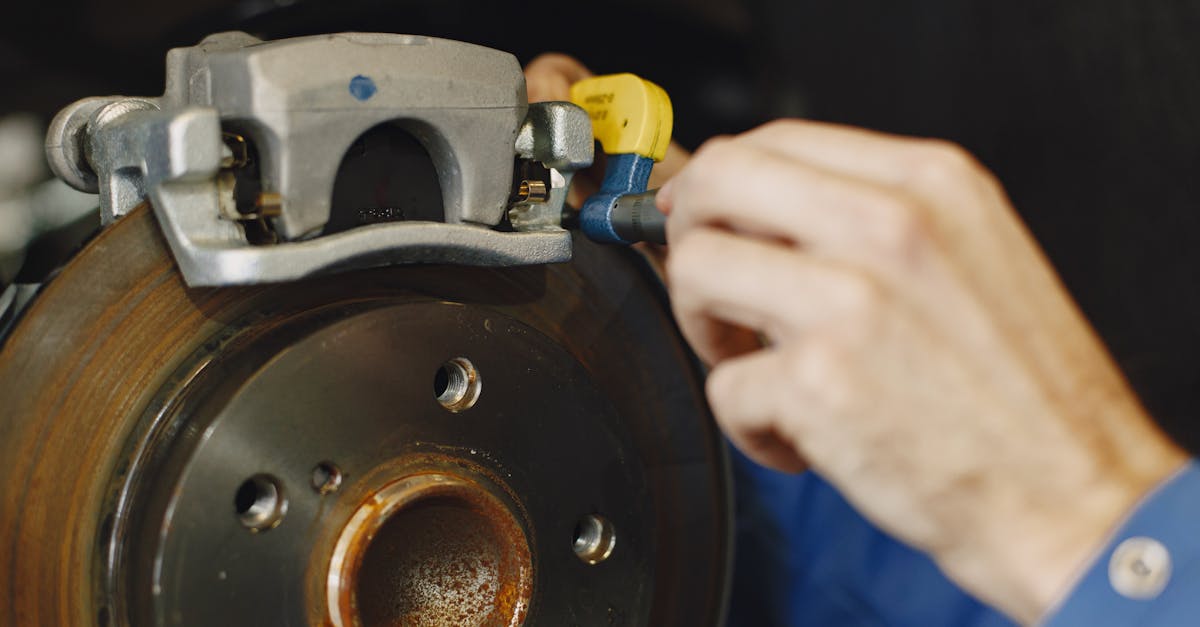
Jack the vehicle at the manufacturer’s recommended lift point, then lower it onto a jack stand. Remove the wheel with your lug wrench. You’ll now see the brake caliper (the clamp that holds the pads) and the rotor (the disc).
The brake pads are the flat friction material pressed against both sides of the rotor. You can usually see the outer pad through the caliper window without removing anything. The inner pad requires looking from behind or below. Use your flashlight.
**Success = ** You can clearly see at least one pad’s edge and thickness. If the caliper design blocks your view entirely, you’ll need to remove it (two bolts, usually 12–14 mm)—but that’s getting into replacement territory. For inspection alone, most cars give enough visibility.
Step 2: Measure the pad thickness
With a caliper, measure the pad material only—not the metal backing plate. Insert the jaws perpendicular to the pad surface and note the reading in millimeters.
No caliper? Use the fingernail test: your fingernail is roughly 2 mm thick. Hold it next to the pad. If the pad is thinner than your nail, you’re at or below the legal limit in most states. Replace immediately.
Check both pads on each wheel (inner and outer), then repeat on the opposite side of the same axle. Write down all four numbers. Uneven wear across an axle means one side is wearing faster—a sign of a sticking caliper or alignment problem—but either way, replacement is due soon.
**Success = ** You have four thickness readings per axle. New pads measure 10–12 mm on the front, 8–10 mm on the rear. Below 4 mm means replacement is coming soon; below 3 mm means schedule it this month.
Step 3: Compare front vs. rear thickness
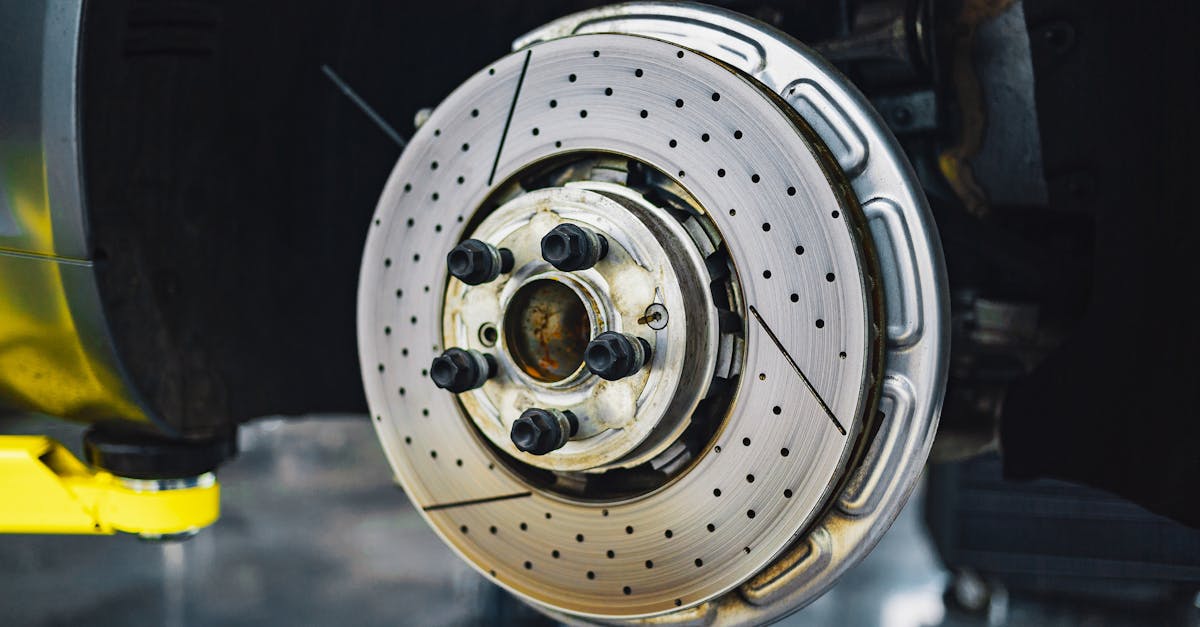
Front brake pads wear two to three times faster than rears because weight shifts forward during braking. Your front brakes do 60–70% of the stopping work. This is normal.
Front pads at 4 mm with rears at 7 mm? That’s the expected pattern. Replace fronts; leave rears alone. Fronts worn out but rears barely touched on a highway-driven car? Also normal—highway driving is gentler on brakes overall.
Exception: EVs and hybrids. Regenerative braking reduces rear pad wear dramatically. Some EVs go 80,000+ miles on rear pads while fronts wear normally. If your fronts need replacement but rears look new and you drive an EV, that’s working as designed.
**Success = ** You understand whether you need front-only, rear-only, or both axles done. Front-first wear is normal. Uneven wear on both axles might signal mountain driving, city stop-and-go, or an issue with your brake proportioning valve.
Step 4: Decide if replacement is needed now or soon
Here’s the threshold chart, based on DOT regulations and industry standards:
| Thickness remaining | Action | Timeline |
|---|---|---|
| 5+ mm | Monitor | Check again in 10,000–15,000 miles or 1 year |
| 3–4 mm | Schedule replacement | Within 3,000–5,000 miles or 2–3 months |
| 2–3 mm | Replace soon | Within 1,000–2,000 miles or 2–4 weeks |
| <2 mm | Replace immediately | Legal minimum in most states; do not delay |
Warning signs that override the chart:
- Squealing: The squealer tab is touching the rotor; you’re at or below 2 mm. Schedule within the week.
- Grinding: Metal-to-metal contact is damaging the rotor. Stop driving and get towed if you hear this.
- Soft or spongy pedal: Hydraulic failure or air in the lines. Not a pad problem, but urgent.
- Brake light + low fluid: Leak or system fault. Stop-now situation.
If pads measure 3 mm, you hear no noise, and you drive mostly local, you have a month or two. If a 2,000-mile road trip is coming, replace them first.
**Success = ** You have a specific timeline and know whether “soon” means this week or next month. You’re not guessing based on a service writer’s “looks like you’re getting close.”
Step 5: Reinstall the wheel and check the other axle
Reinstall the wheel and torque the lug nuts to spec (check your owner’s manual; most cars are 80–100 ft-lbs). Lower the vehicle and repeat on the rear axle if you only checked fronts, or vice versa.
You need data from both axles to understand your full brake health. Don’t assume rears are fine just because fronts are worn.
**Success = ** You have thickness data for all four corners and know which axle needs work.
Verify it worked

After reinstalling all wheels and lowering the car, pump the brake pedal a few times—it should feel firm. If it went soft during inspection (it shouldn’t have if you didn’t touch the caliper), that’s a red flag. Check for fluid leaks or air in the system.
Test-drive in a safe area at low speed. Brakes should feel normal. If something seems off, go back and check your work, or take it to a shop if you’re unsure.
Troubleshooting
Can’t see the inner pad
The inner pad hides behind the caliper on many designs. Remove the caliper (two bolts, but now you’re doing half the job anyway), use a small mirror to look from below, or assume the inner matches the outer pad’s wear (usually true, but not always). If the outer pad is 3 mm, replace both.
Front pads thin, rears still new
Normal. Replace fronts; leave rears alone. Don’t let a shop upsell you on rears “while we’re in there” if your rears are above 5 mm.
Brake light on but pads measure 5 mm
The light can also mean low brake fluid (check the reservoir under the hood) or a sensor fault. If pads are thick and fluid is full, the sensor or wiring may be bad—a separate diagnosis.
One side of the axle much thinner than the other
Sticking caliper, bad slide pins, or alignment problem. Replace pads on both sides (always replace in pairs), but have the shop diagnose why one side wore faster. If you don’t fix the underlying issue, new pads will wear unevenly again.
When to call a professional
Brake pad replacement is not a beginner DIY job. It requires removing calipers, compressing pistons, sometimes bleeding the hydraulic system, and dealing with brake dust (which contains asbestos on older vehicles—toxic). Pay a shop. The inspection you just completed is the DIY part; the replacement is the professional part.
Call a pro immediately if:
- You hear grinding when braking (rotor damage is occurring; delay will double the repair cost)
- The brake pedal feels soft, spongy, or goes to the floor (hydraulic failure risk)
- The brake warning light is on and fluid level is low (leak or system fault)
- You see fluid leaking from the caliper or brake line (do not drive; tow to a shop)
Brakes are the one system where “I’ll get to it next month” can put you in a ditch. If any of the above apply, stop driving and call for service.
Real replacement costs (front vs. rear)
Brake pad replacement costs in 2026, by shop type and region. These are pads only—if rotors are damaged (grooved, warped, below minimum thickness), add $300–$800 for rotor replacement or resurfacing.
Front pads (labor + parts, per axle):
- Independent shop: $150–$250
- Chain shop (Firestone, Midas, Pep Boys): $200–$350
- Dealership: $250–$450
Rear pads (labor + parts, per axle):
- Independent shop: $120–$200
- Chain shop: $180–$300
- Dealership: $200–$400
Rears usually cost less because the work is faster and rear pads are cheaper. The labor is the same; the part and time are lower.
Regional variation: Urban markets (New York, San Francisco, Los Angeles) run 20–40% higher than these ranges. Rural and small-town shops trend toward the low end.
Pad material trade-offs:
- Economy (semi-metallic aftermarket): Cheapest, louder, more dust. Lasts 30,000–50,000 miles. Fine for vehicles you’re not keeping long.
- OEM (original equipment): Usually ceramic or semi-metallic blend. Lasts 40,000–70,000 miles. Middle-ground cost.
- Premium ceramic (Brembo, luxury OEM equivalent): Quietest, least dust, longest life (50,000–80,000 miles). Costs more upfront but means fewer replacements over the car’s life.
The shop will offer all three. If you’re keeping the car and drive it daily, OEM or ceramic is worth the extra cost. If you’re selling it in two years, economy pads are fine.
The unstated math: If your pads measure 3–4 mm and you ask for replacement, they’ll say yes. They won’t say “you could wait another month” because the earlier you replace, the sooner you’re back. That’s not dishonest—it’s how service intervals work. But if you know the actual numbers, you can make the call yourself and skip the upsell.
FAQ
How do I know if my brake pads need replacing?
Measure thickness with a caliper or the fingernail test. Below 3–4 mm means schedule replacement. Squealing = 2 mm or less; get it done within the week. Grinding = rotor damage is happening; stop driving and call a shop.
What is normal brake pad thickness?
New front pads are typically 10–12 mm; rears are 8–10 mm. The legal minimum in most states is 2 mm. Safe replacement threshold is 3–4 mm, giving you time to shop for a good price instead of emergency rates.
Do front pads wear faster than rear?
Yes. Fronts wear two to three times faster due to weight transfer during braking—they handle 60–70% of the stopping force. Normal. Replace fronts more often; rears can go 60,000–80,000 miles or more, especially on highway-driven cars or EVs.
Can I replace just the front brake pads?
Yes, but always replace both sides of the axle together. Replacing only one side creates uneven braking pressure and increases stopping distance. Never replace one corner alone.
How much does brake pad replacement cost?
Front pads typically run $150–$300 at an independent shop, $200–$350 at a chain, and $250–$450 at a dealership. Rears run 15–25% less. If rotors need replacing, add $300–$800. Premium ceramic pads cost more upfront but last longer.
How long do brake pads last?
30,000–70,000 miles or 3–5 years, depending on driving style and environment. City driving and mountain roads shorten lifespan; highway cruising extends it. Fronts always wear out first. Check thickness every oil change or once a year.
Can I drive with the brake warning light on?
Cautiously, and only to a mechanic. If pads are at minimum thickness (2 mm) and there’s no fluid leak, you can drive short distances at low speed. If the pedal feels soft or the light comes on with low fluid, stop immediately—that’s a hydraulic fault, not just thin pads.
What’s the difference between ceramic, metallic, and semi-metallic pads?
Ceramic pads are quietest, produce less dust, and last longest, but cost more. Semi-metallic is the OEM standard for most cars—middle cost, decent life. Metallic (pure metal, now rare) are cheaper, louder, and dustier; mostly on older vehicles. For daily drivers you’re keeping, ceramic is worth it.
Brake pads don’t fail all at once—they give you warning if you’re paying attention. Measure thickness once a year or any time you hear noise or feel a change in braking. At 3–4 mm, schedule an appointment and get quotes. At 2 mm, do it this week. Below 2 mm, you’ve waited too long and you’re paying for rotor damage too.
For how brake inspections fit into your overall service calendar, see Car Maintenance Schedule by Mileage: What’s Real vs. Upsell. If you’re weighing other age-based replacements like tires, Tire Replacement Cost by Size and Brand: Real Numbers covers the same cost-versus-safety tradeoff. For what else you can check yourself versus what needs a pro, see 7 Common Car Repairs You Can Do Yourself (And Real Cost Savings).
Safety note: Brakes are safety-critical. Grinding, soft pedals, and fluid leaks are stop-now warnings. Thin pads reduce stopping power and damage rotors.
When to see a pro: Brake pad replacement, rotor service, and hydraulic work require proper tools, experience, and liability coverage. Inspection is DIY-friendly; replacement is not.
General information, not professional mechanical or financial advice. Brake wear, replacement costs, and timelines vary by vehicle, driving style, region, and local labor rates. Consult your owner’s manual and a certified mechanic for specific guidance on your car.