

The legal minimum is 2/32”, but the safe threshold is 4/32”. That gap matters because wet-weather braking performance falls off sharply as tread wears. Research from NHTSA and IIHS shows that stopping distance increases significantly as you drop below 4/32”, and by the time tread reaches the legal 2/32” minimum, wet-pavement braking distance can nearly double compared to deeper tread. The law lets you drive on worn tires; physics doesn’t.
Here’s how to check tread depth in under five minutes — and why checking in multiple spots on each tire tells you whether you’ve got an alignment problem eating your next set of tires.
What you’ll need
Pick one method:
Method 1 — Penny test (quick screening):
- One U.S. penny
Method 2 — Tread depth gauge (precise):
- Mechanical gauge ($5–$15) or digital gauge ($20–$40) from any auto-parts store
Method 3 — Wear indicator bars (no tools):
- Just your eyes
The penny test (quick check)
Time: 1 minute per tire
- Hold a penny so Lincoln’s head points down into the tread groove.
- Insert it into the groove at six spots per tire: center tread, inner edge (near the rim), outer edge (shoulder), and three points in between.
- If you can see the top of Lincoln’s head, tread is at or below 2/32” — you’re past the legal minimum and replacement is overdue.
- If Lincoln’s head disappears into the tread, you’re still above 2/32”. That doesn’t mean you’re safe (see the 4/32” threshold below), just that you’re not yet illegal.
Why check six spots: Tires wear unevenly. If the inner edge is bald but the center still has tread, you’ve got an alignment or inflation problem. Catching that now saves you from burning through a new set in 15,000 miles.
What the penny test won’t tell you: Whether you’re at 4/32” — the point where wet-weather braking performance starts to fall off. The penny only confirms you’ve hit rock bottom.
How to use a tread depth gauge (precise measurement)
Time: 2 minutes
- Buy a mechanical or digital tread depth gauge. Digital reads easier; mechanical never needs batteries.
- Insert the probe straight down into a tread groove (not on a raised tread block).
- Press the gauge base flat against the surrounding tread, then read the measurement in 32nds of an inch.
- Repeat at five to six spots per tire — center, inner edge, outer edge, and between.
- Record the shallowest reading per tire. That’s your true depth.
Benchmarks:
- 6/32” or more: Good; safe for all conditions.
- 4/32”: Time to replace for dry-weather driving. Replace sooner if you drive in rain or snow.
- 2/32”: Legal minimum. Wet braking distance is now severely compromised. Replace immediately.
Tread wear indicator bars (built-in check)
Time: 30 seconds
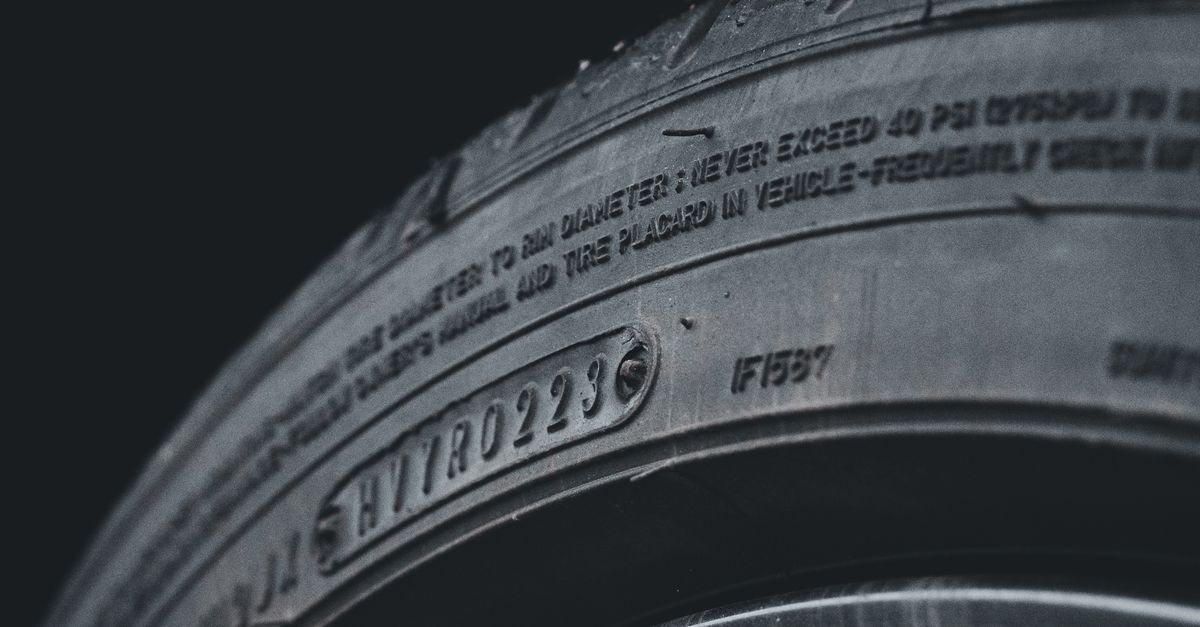
Look for small rubber ribs running perpendicular to the main tread grooves. Most modern tires have them molded into the grooves.
- If the ribs are flush with the tread surface, depth is at or below 2/32” and you’re at the legal limit.
- If you can feel or see a depression between the rib and tread, you’ve got some depth left.
Not all tires have obvious wear bars. If you can’t find them, use the penny or gauge method.
When to replace tires: legal vs. safe
The law says 2/32”. Safety researchers say 4/32”. Here’s why that difference matters.
| Tread Depth | Legal Status | Braking Performance (Wet) | Replace? |
|---|---|---|---|
| 6/32” or more | Legal | Best stopping distance, best hydroplaning resistance | No |
| 4/32” | Legal | Braking distance noticeably increases on wet pavement | Yes (safety threshold) |
| 2/32” | Legal minimum | Braking distance severely compromised vs. 6/32” | Overdue |
| Below 2/32” | Illegal | Severe hydroplaning risk, drastically longer stops | Immediate replacement |
The trade-off: Replacing at 4/32” costs the same as waiting until 2/32” — you’re buying new tires either way. The only difference is you’re driving on tires with significantly reduced wet-braking grip for those last few thousand miles. That’s the gamble.
If you’re budgeting for replacement, see Tire Replacement Cost by Size and Brand: Real Numbers for cost ranges by vehicle and tire quality.
Winter driving: replace at 6/32”, not 4/32”
For drivers in snow-prone regions, the replacement threshold is higher. Tire manufacturers and NHTSA tire safety guidance recommend replacing tires at 6/32” tread depth for regular winter or snow driving conditions. Below that depth, snow traction and ice grip drop off significantly — even though the tire remains legal.
The threshold breakdown:
- 6/32”: Replace for winter/snow driving
- 4/32”: Replace for dry and moderate-wet driving
- 2/32”: Legal minimum (all conditions)
If you’re running dedicated winter tires, replace them at 6/32”. If you’re in a climate with seasonal snow, consider swapping to winter tires when your all-seasons hit 4/32” rather than waiting. Winter tire rubber hardens in freezing temperatures, and worn tread compounds the problem. See Seasonal Tire Storage Costs: What You’ll Actually Pay and Winter Car Maintenance Cost: Fluids, Tires & Real Numbers for budgeting.
What uneven wear tells you (and how to avoid wasting your next set)
Check tread depth at the inner edge, center, and outer edge of each tire. If one area is significantly more worn, you’ve got a problem that’ll chew through your next set just as fast.
Inner or outer edge worn faster than center:
- Cause: Misalignment (camber or toe out of spec).
- Fix: Wheel alignment. Without it, new tires will wear the same way.
- Cost to fix: See Wheel Alignment Cost and How Often You Need It.
Center worn faster than edges:
- Cause: Chronic overinflation.
- Fix: Check tire pressure monthly; inflate to the PSI on the driver’s door jamb sticker (not the max PSI on the tire sidewall).
Edges worn faster than center:
- Cause: Chronic underinflation.
- Fix: Same as above — inflate to the door-jamb spec.
Patchy or cupped wear:
- Cause: Worn suspension components (shocks, struts, ball joints).
- Fix: Suspension inspection and repair. See Suspension Noise and Repair Costs: Struts vs Control Arms.
Do not buy new tires until you fix the root cause. Otherwise you’re paying for the same wear pattern twice.

When to replace based on age, not just tread
NHTSA recommends tire inspection at 6 years and replacement by 10 years, regardless of remaining tread depth. Tire rubber compounds degrade over time even if the tire hasn’t been driven hard — UV exposure, ozone, and heat cause internal cracking and hardening that tread-depth checks won’t catch.
Check the DOT date code on the tire sidewall. The last four digits show week and year of manufacture (e.g., “2318” means the 23rd week of 2018). If the tire is over 10 years old, replace it even if tread depth looks legal. If your tires are 6 years or older, have them inspected annually for cracking, bulging, or other age-related damage.
This matters: a 12-year-old tire with 5/32” tread depth can fail catastrophically due to internal dry rot, even though it passes a tread check.
How often to check
- Monthly if tread is at or below 4/32”.
- Every oil change (roughly every 5,000–7,500 miles) if tread is above 4/32”.
- Before long trips — especially road trips in rain or winter weather.
Add it to your routine maintenance checklist: Car Maintenance Schedule by Mileage: What’s Real vs. Upsell.
Bottom line: The penny test screens for the legal minimum. A tread depth gauge tells you when you’re approaching the safety threshold (4/32” for most driving; 6/32” for winter conditions). Checking multiple spots per tire catches alignment and inflation problems before you waste money on premature replacements. And don’t ignore tire age — rubber degrades whether you drive on it or not. The difference between legal and safe is a few thousand miles of compromised braking grip and structural integrity you can’t see from the outside.
General information, not professional mechanical or financial advice. Tread depth is one factor; tire age, damage, and driving conditions also affect replacement timing.